If you want to pair your Perspective Database with a Windows account, you configure Microsoft SQL Server to use a local SQL account or Windows account.
SQL Server Configuration
-
Open SQL Server Management Studio.
-
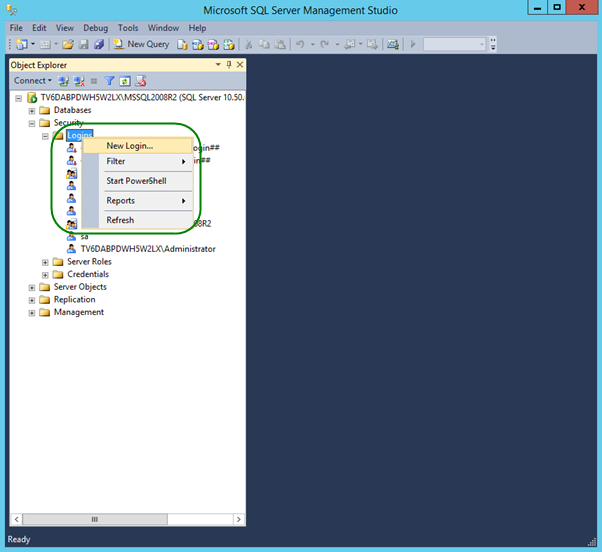
Expand the Security
-
Right-click Logins.
-
Click New Login.
-
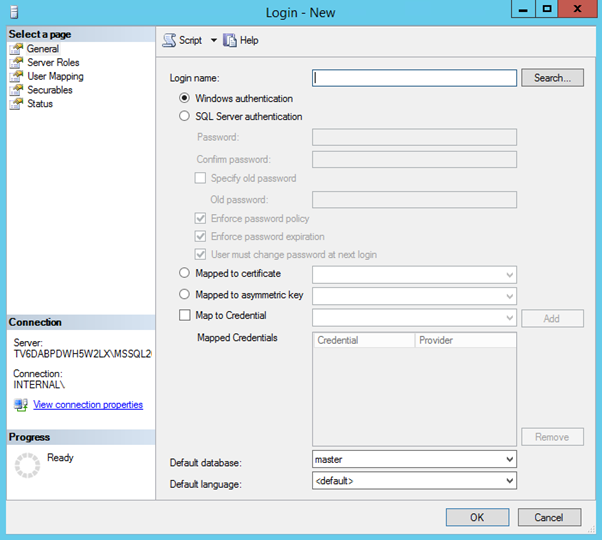
Enter the Login name of the Windows account you wish to use for Perspective.
-
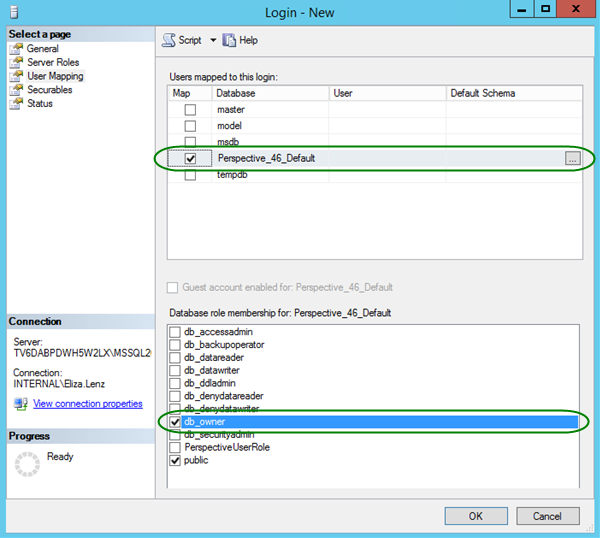
Under Select a page, click User Mapping.
-
Select the Perspective database checkbox under Users mapped to this login.
-
Select the db_owner checkbox under the Database role membership for: section.
-
Click OK.
Web Application Configuration
After installing Perspective Services and Service manager on the application server, you’ll need to use Service Manager to connect to your Perspective database.
-
Login into the application server with the Windows account used in SQL Server Management Studio.
-
Hold down the Shift key on your keyboard then right-click Service Manager.
-
Click Run as different user.
-
On the database connection screen, select your SQL server from the SQL Server drop-down menu.
-
Select the Windows Authentication radio button.
-
Select the Perspective database from the Databases drop-down menu.
-
Click OK to save your changes.
Failed to Bind Error
After completing the above steps, some users may encounter the following error: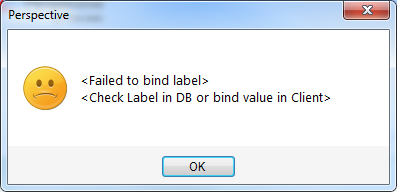
This is error likely appears because the Perspective application pool in the IIS Manager doesn’t have the appropriate rights to allow the program to access the database.
-
Launch Internet Information Services (IIS) Manager.
-
Expand the local host node in the Connections pane.
-
Click Application Pools.
-
Right-click the Perspective database in the Application Pools pane.
-
Click Advanced Settings.
-
Under Process Model, click Identity.
-
Click the
 icon.
icon.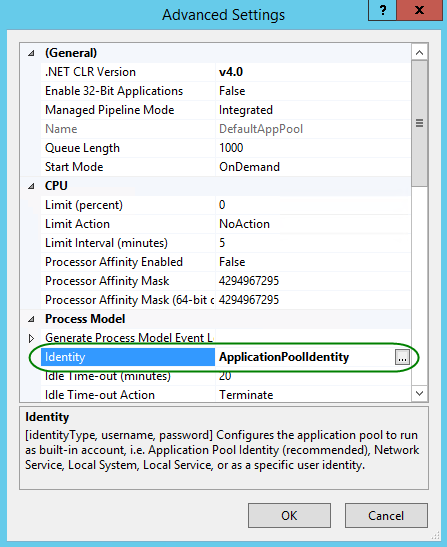
-
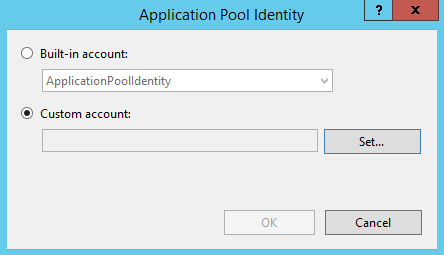
In the Application Pool Identity window, select the Custom account radio button.
-
Click Set.
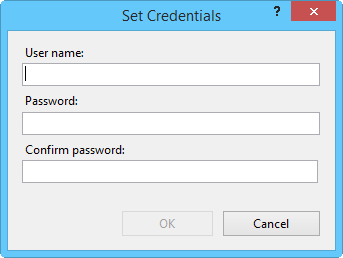
-
Enter the Windows username and password for the Perspective database.
-
Click OK to return to the main Internet Information Services (IIS) screen.
-
Ensure the Perspective database is still selected in the Application Pools pane.
-
Click Recycle.
Note: Recycling may need to be repeated for Integration Services application pool if you use the web portal, the Perspective iOS application, or a custom API integration.